First steps
After installing the Raspberry Pi CM4 on the Pi-Cast and flashing the image from the download page you can get ready to power it on. If you haven't flashed the image you can follow this tutorial to flash your TF card or the eMMC version CM4.
-
Power up the Pi-Cast
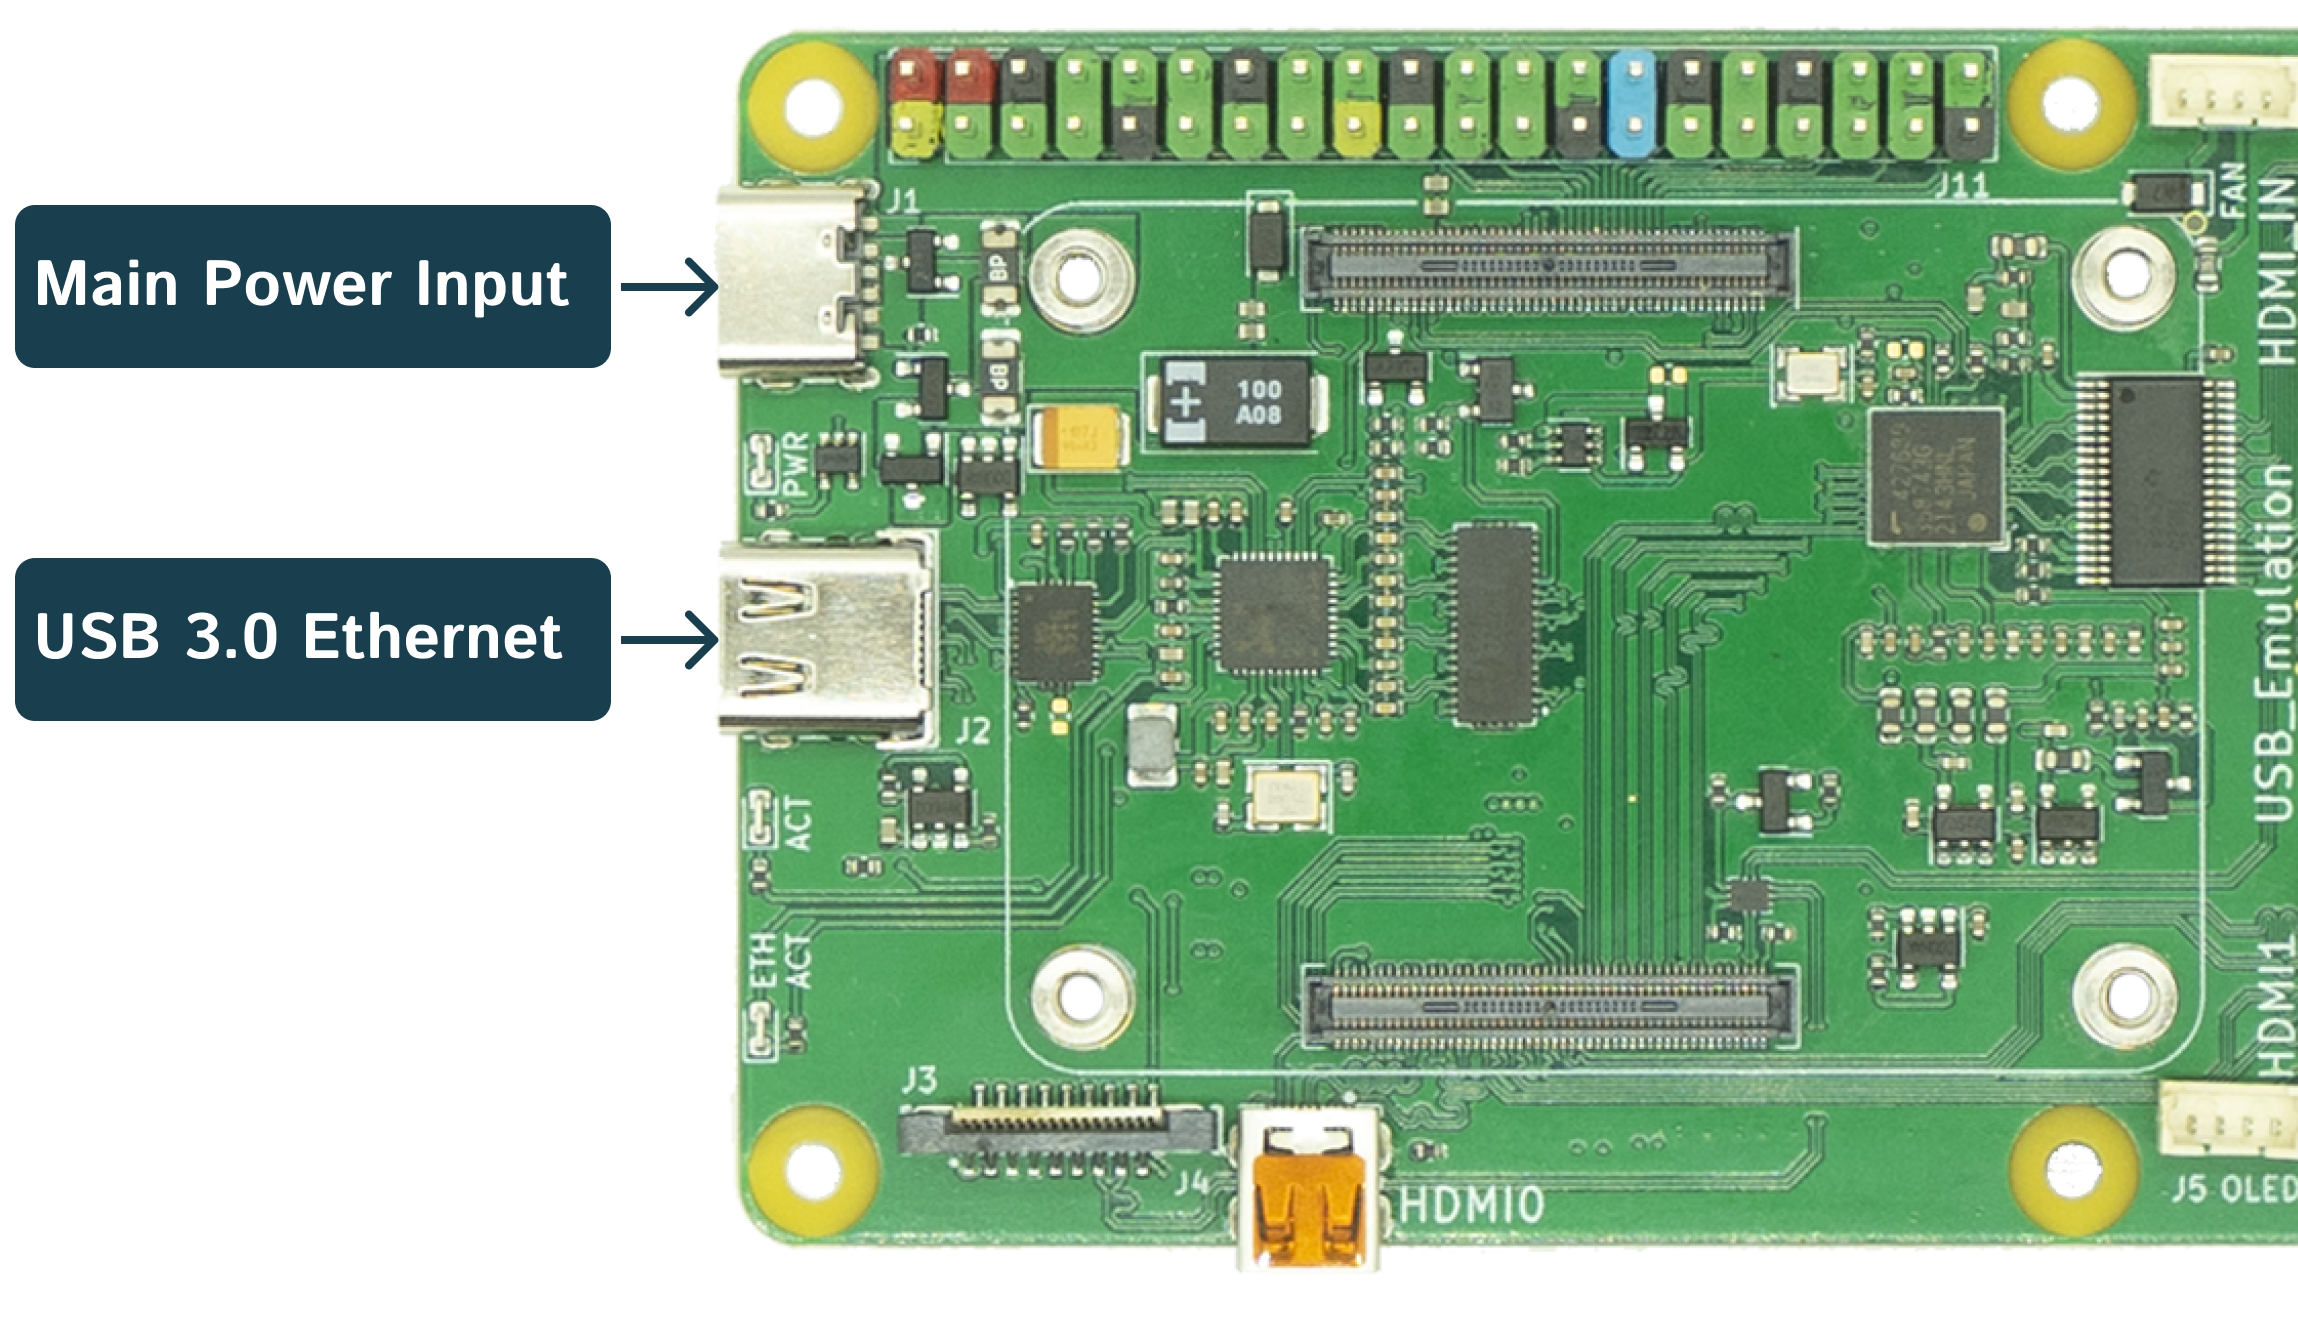
Pi-Cast supports many ways of power input. You can use both the main power input and the USB 3.0 ethernet port to power up the Pi-Cast. And even can be powered up by PoE(power over ethernet) when using the Pi-Cast Hat or the Pi-Cast KVM switcher.
Power adapter specs
The output voltage of the power adapter should be 5V, with a maximum of 5.2V.
For the power adapter's output current, it should be no less than 1.5A when only the Pi-Cast and the CM4 module are in use. If accessories are connected, the output current should be no less than 3A. For most scenarios, we recommend using the official Raspberry Pi 4B 5V/3A power adapter.Power source paths
If you connect both the main power input and the USB 3.0 Ethernet port to power adapters simultaneously, the Pi-Cast will automatically select the input with the higher voltage as its power source.
Main power input is necessary when the USB 3.0 Ethernet port is being used for data transfer.
If you're connecting the USB 3.0 Ethernet port to a PC or laptop to access the Pi-Cast, it's necessary to connect a power adapter to the Main power input. This is because the power output capability of the USB 3.0 standard is only up to 5V/900mA, and even less for the USB 2.0 standard (5V/500mA).
While you can power up the Pi-Cast at 5V/900mA, it may cause the device to reboot during high-demand operations. However, if you can confirm that the USB port on your PC/laptop — which is connected to the USB 3.0 Ethernet port — is capable of outputting 5V/3A (some USB-C ports that support the USB PD standard can output 5V/3A), you can use the USB 3.0 Ethernet port for both data and power. In this case, there would be no need for the main power input.
Do not turn off the device until it's fully booted for the first time
After turning on the power, PiKVM OS will perform the necessary operations on the memory card.
-
Connect to the target device you want to control
HDMI input connection
Connect the HDMI input port to your target device's HDMI output port
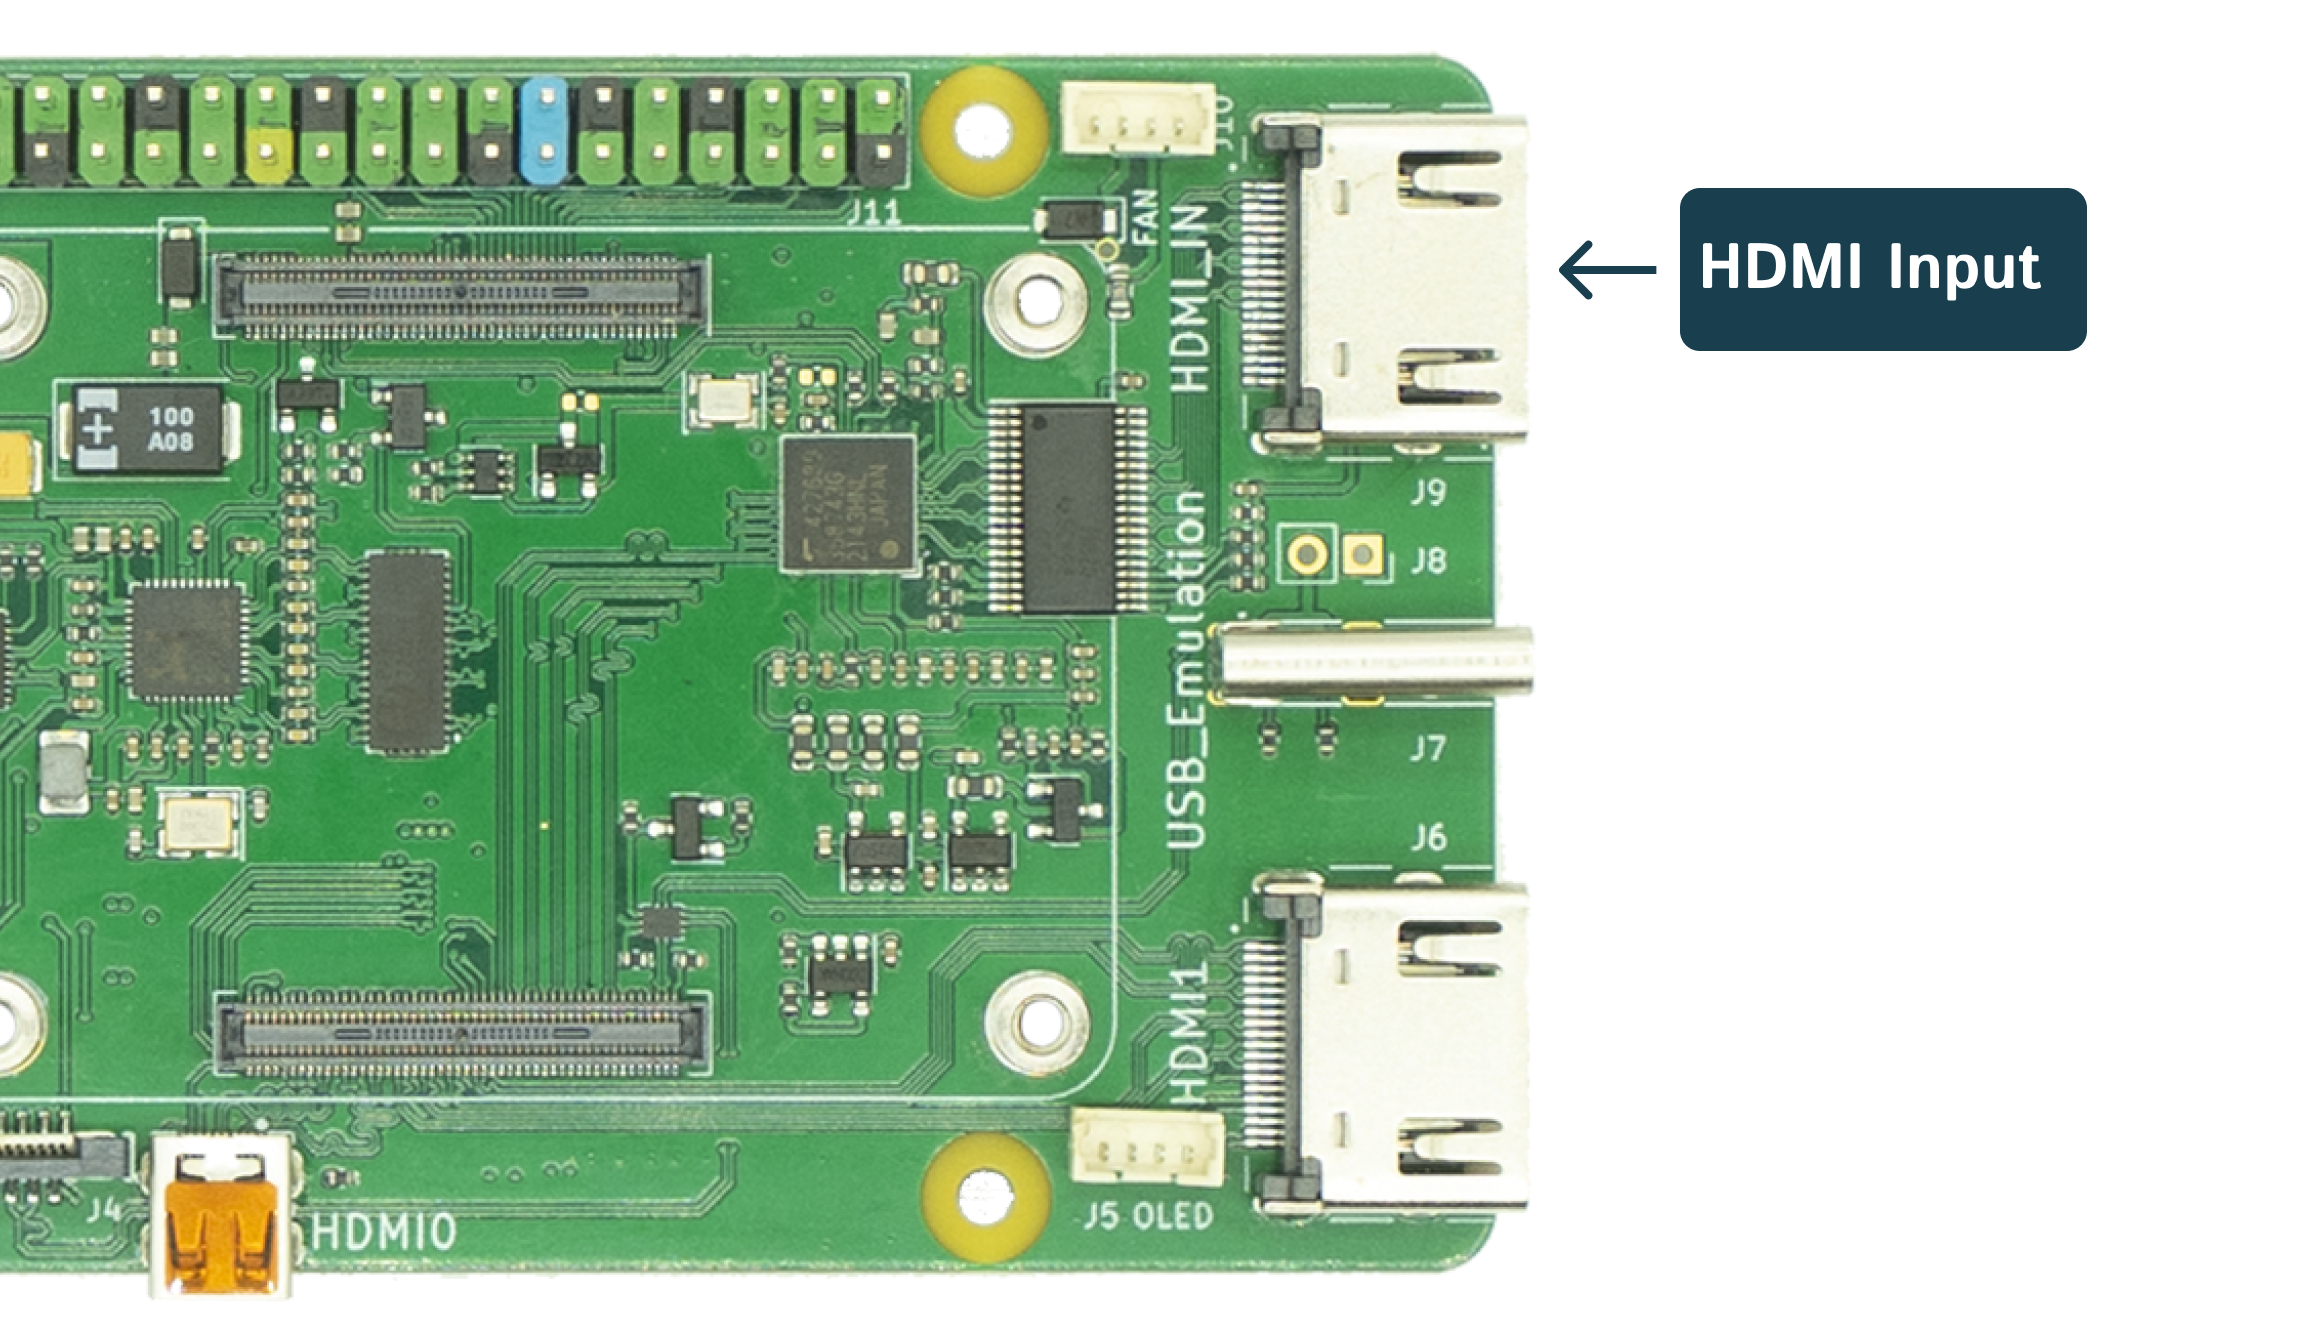 If your target device doesn't feature an HDMI output, consider using a converter to change the video output to HDMI. This could be a DP to HDMI converter, DVI to HDMI converter, among others depending on the type of video output your target device has.
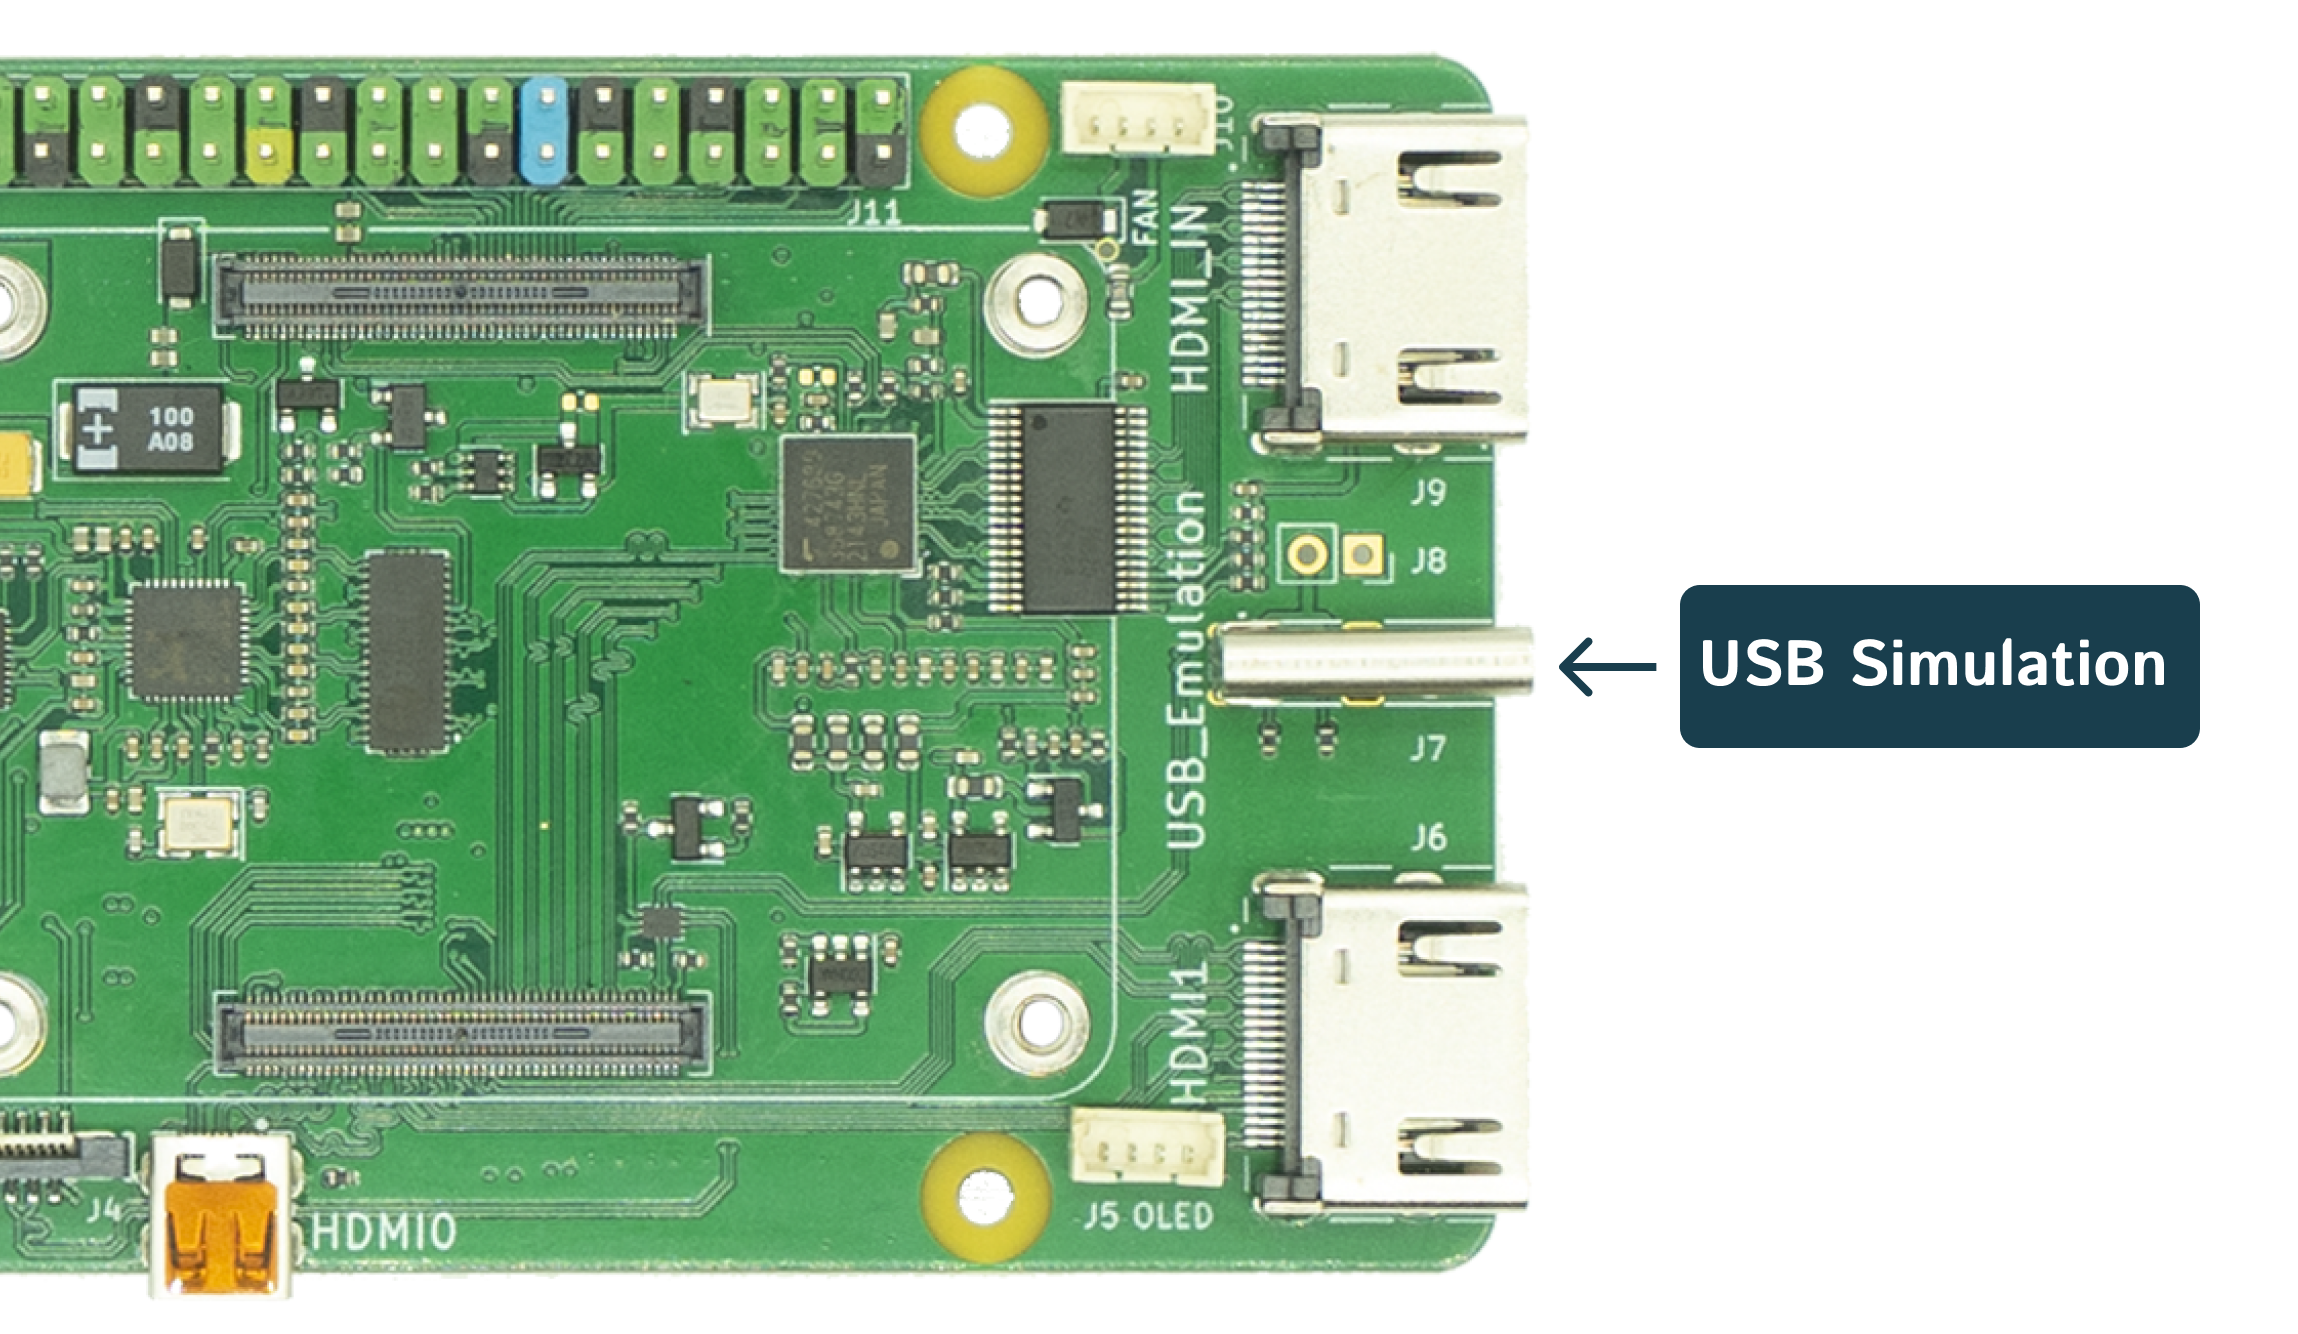
USB simulation connection
Connect the USB simulation port to your target device's USB port using either a USB-C to USB-A cable or a USB-C to USB-C cable, depending on the type of USB port your target device has.
ATX connection
sdfalskdfsdfdf
-
Getting access to Pi-Cast
Before you get access to the Pi-Cast you should determine what kind of physical connection you should use.