Get Pi-Cast Online
There are many ways to get your Pi-Cast online.
Revert the DHCP service setting on eth0
This step is only required for connect the Pi-Cast to the internet throuht RJ45 port or the USB3.0 Ethernet port. No need for Wi-Fi and cellalur connection.
Since connecting the Pi-Cast to the internet via the onboard USB3.0 ethernet or RJ45 port will requires the PC or router assigning an IP address to the Pi-Cast's eth0 network interface. This will conflict with the DHCP service we set for the eth0 network interface in the Setup the USB3.0 Ethernet section.
As theoretically, there can only be one DHCP service for assigning IP addresses on the same network. Therefore, we need to stop the DHCP service set for the eth0 network interface in the Setup the USB3.0 Ethernet section and configure the eth0 network interface to automatically obtain an IP address.
You can just skip the Setup the USB3.0 Ethernet section when using the official images from PiKVM website. If you are using the pre-build images for Pi-Cast, you can follow the below steps to disable the DHCP service that set up for the eth0 network interface.
- Mount the system as writeable.
rw - Disable the
dnsmasqservice.systemctl disable dnsmasq - Change the setting from static IP to DHCP of the
eth0network interface. Change the[Network]section of the file/etc/systemd/network/eth0.networkto the following content.[Network] DHCP=yes DNSSEC=no #Address=192.168.2.1/24 -
Remount the system as read-only and reboot.
ro&reboot&exit
RJ45 Ethernet port
Connect the Pi-Cast to the internet throught the RJ45 Ethernet port require install the accessorires Pi-Cast Hat or Pi-Cast KVM switcher.
After installing the accessories board with an RJ45 ethernet port on it, the next step is to change position #2(CM4 ethernet routing) of the dip switch into status ON. This will route the CM4 ethernet signal to the RJ45 ethernet port of the accessory board.
Then plug the RJ45 cable into the RJ45 ethernet port on the accessories board, you are ready to to go.
Though the USB3.0 Ethernet
-
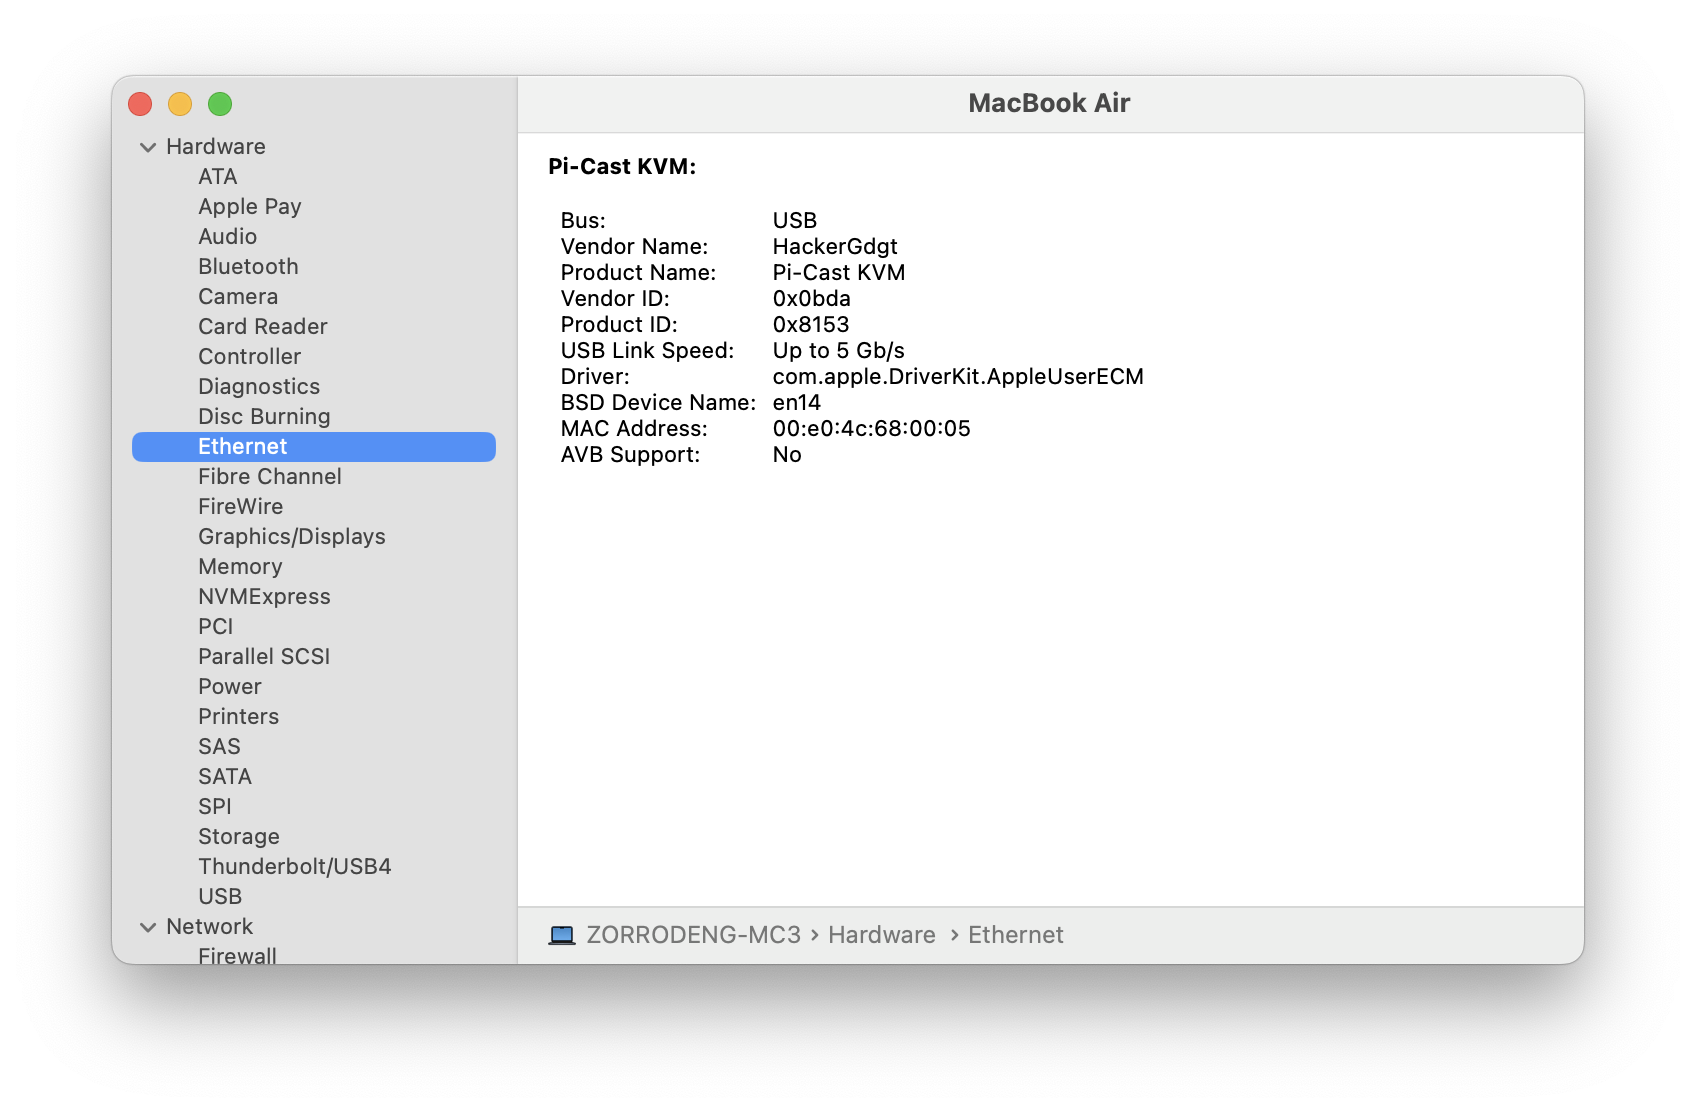
Identify the ethernet interface name. Goto "System Setting"->"General"->"About", scroll to the end of the page, click on "System Report".


Click the "Ethernet" on the left tab. And all ethernet connections will show on the right. Find the one called "Pi-Cast KVM". The value of "BSD Device Name" is the ethernet interface name we want. In this case, the name is "en14".
-
Goto "系统设置"->"通用"->"共享", click the info icon of
Internet Sharing. Select the connection you want to share on the dropdown menu. Then click the check box on the "Pi-Cast KVM" connection. Click finish.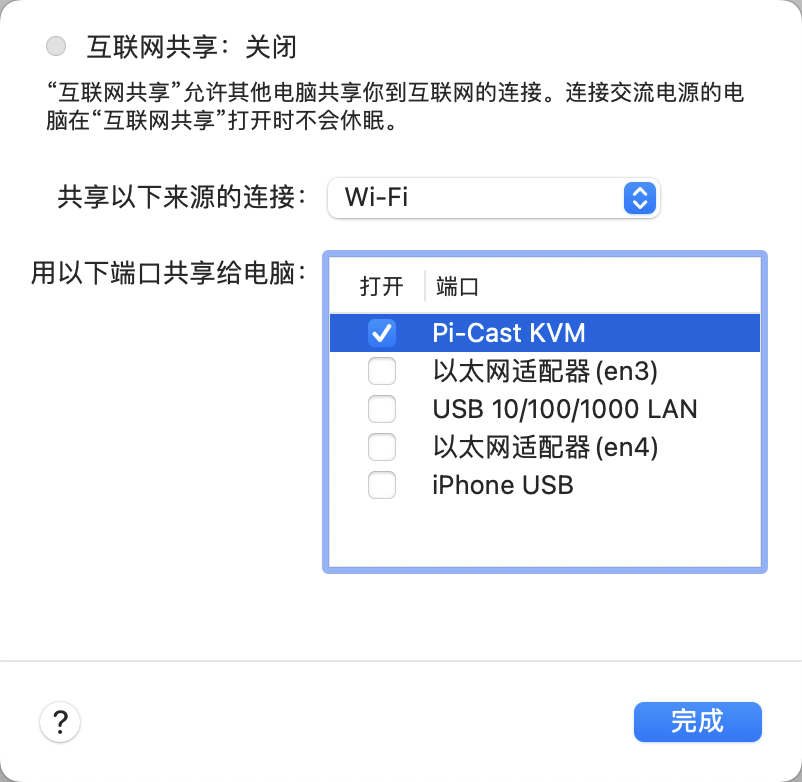
- Turn on the switch in
Internet Sharing. A confirmed dailog will show up. ClickOn.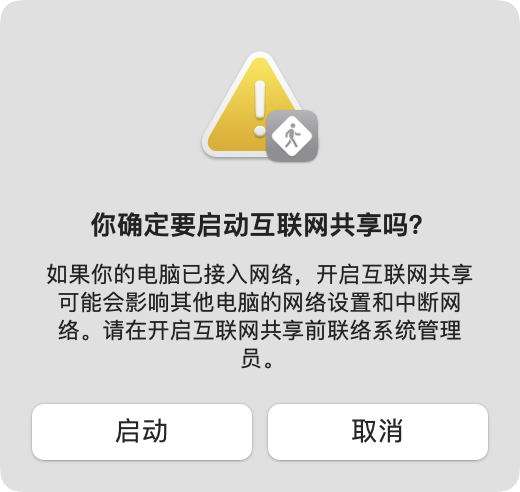
- Open the terminal and type in the below command to find the IP address assigned to the Pi-Cast.
sudo arp -i en14 -a
Output of sudo arp -i en14 -a
user@macOS ~ % sudo arp -i en14 -a
raspberrypi.local (169.254.219.83) at e4:5f:1:58:4b:c6 on en14 [ethernet]
? (239.255.255.250) at 1:0:5e:7f:ff:fa on en14 ifscope permanent [ethernet]
raspberrypi.local is the hostname of Pi-Cast, it may be different from different operating systems. For example, on PiKVM os the hostname is PiKVM.local
The IP address comes after the hostname is the IP address assigned to Pi-Cast. In this case, it's 169.254.219.83. Now you can use 169.254.219.83 to access your Pi-Cast.
Not write yet
Need to write sometime.
Not write yet
Need to write sometime.
Not write yet
Need to write sometime.
WiFi
Step by step - Advances users ONLY section
-
Make filesystem writable using
rwcommand. -
Create Wi-Fi settings file
/etc/systemd/network/wlan0.networkwith following content:[Match] Name=wlan0 [Network] DHCP=yes DNSSEC=no # Use same IP by forcing to use MAC address for clientID [DHCP] ClientIdentifier=mac -
Set network ESSID and password:
# wpa_passphrase 'MyNetwork' 'P@assw0rd' > /etc/wpa_supplicant/wpa_supplicant-wlan0.confUsing Wi-Fi with hidden ESSID
Add option
scan_ssid=1to/etc/wpa_supplicant/wpa_supplicant-wlan0.confUsing 5GHz Wi-Fi in the USA
Add option
country=USto/etc/wpa_supplicant/wpa_supplicant-wlan0.conf -
Enable WPA-supplicant service:
systemctl enable wpa_supplicant@wlan0.service -
Make filesystem read-only again using
rocommand
Useful console commands
iwconfig- Manipulate the basic wireless parameters.iwlist- Allow's you to initiate scanning and list frequencies, bit-rates, encryption keys, etc.iwspy- Displays per node link quality.iwpriv- Allow's you to manipulate the Wireless Extensions specific to a driver (private).
Some examples
# iw dev wlan0 scan | egrep "signal:|SSID:" | sed -e "s/\tsignal: //" -e "s/\tSSID: //" | awk '{ORS = (NR % 2 == 0)? "\n" : " "; print}' | sort
# iwlist wlan0 scan | egrep "Cell|ESSID|Signal|Rates"
# iwlist wlan0 scan
# iw wlan0 info